
Transform Your Kitchen Island With Custom Trim and Molding Makeovers
The kitchen island stands as the centerpiece of the modern home’s most cherished space: the kitchen. Beyond its functional value, the kitchen island offers a unique opportunity for homeowners to inject personal style and charm into their kitchens. We are a great fan of adding the perfect backsplash to your kitchen to make it stand out, but today, we want to focus on kitchen islands!
Learn all about how you can customize your kitchen island with trim and molding, transforming it from merely functional to a stunning focal point of your home’s interior.
How to Customize a Kitchen Island with Trim
Customizing your kitchen island with trim is a fantastic way to inject personality and style into your space. Start by selecting a trim style that complements your kitchen’s overall aesthetic.
Whether you opt for a classic, ornate design or a sleek, modern look, the key is in the details. Measure your island carefully, choose your materials, and prepare your tools.
A combination of planning and creativity will ensure your customized kitchen island becomes a standout feature in your home.
Trim Ideas for Kitchen Islands
The possibilities for kitchen island trim are virtually limitless. Consider the overall theme of your kitchen when selecting your trim.
For a rustic look, thick wooden trim stained to match your cabinetry can add warmth and charm.
For a more contemporary kitchen, consider a minimalist trim in a glossy finish to keep the space feeling open and clean.
Playing with trim sizes and placement can also add visual interest and depth to your kitchen island.
Customize a Kitchen Island with Trim
To customize a kitchen island with trim, start by envisioning the final look.
Do you prefer a subtle accent or a bold statement? Once you have your vision, select the trim that matches your desired aesthetic and measure the island to determine how much trim you’ll need.
Cutting, fitting, and attaching the trim requires precision, but with patience and careful work, you can achieve a beautiful, customized look that elevates your kitchen’s style.
Island Makeover with Baseboard Molding
Baseboard molding adds a finished look to your kitchen island, creating a seamless transition from island to floor.
When selecting baseboard molding, consider the height and profile that will best match your kitchen’s design.
Installation involves measuring, cutting, and attaching the molding to the island’s base, ensuring it’s both level and securely fixed.
This simple addition can have a dramatic impact on your kitchen’s overall appearance.
Kitchen Island Makeover
A kitchen island makeover can breathe new life into your kitchen without the need for a full renovation.
Start with a vision of the finished project, considering elements like color, texture, and overall style.
Replacing the countertop, adding new trim or molding, and updating fixtures like knobs and pulls can transform your island into a new piece.
Don’t forget the power of paint – a new color can entirely change the mood of the space.

DIY Kitchen Island Makeover
A DIY kitchen island makeover is a rewarding project that allows for complete creative control.
Assess your island’s current condition and functionality to determine what changes will make the most impact.
Whether it’s adding new trim, painting, or even installing a new countertop, each step can significantly alter the island’s look and feel.
With the right tools and a step-by-step approach, you can achieve a professional-looking upgrade on a budget.
Custom Trim Kitchen Island Makeover
Creating a custom trim kitchen island makeover involves designing a unique trim pattern or incorporating specialized elements that reflect your personal style.
This could mean adding intricate moldings, custom panels, or even decorative corbels for a touch of elegance.
The key to success lies in meticulous planning and execution, ensuring that each piece of trim or molding fits perfectly and enhances the island’s overall design.
Adding Molding to A Kitchen Island
Molding can transform a plain kitchen island into a sophisticated centerpiece. Choose a molding style that complements your kitchen’s decor, and plan the layout carefully to achieve a balanced look.
Installation requires precision cutting, careful alignment, and secure attachment to the island.
Finishing touches like caulking and painting will ensure a seamless integration of the molding, elevating the island’s aesthetic appeal and adding a layer of sophistication to your kitchen.
The Basics of Kitchen Island Customization
Understanding Kitchen Island Trim
Trim, in the context of kitchen islands, refers to decorative moldings that add detail and finish to the island’s base, corners, and edges.
Materials range from traditional wood to modern medium-density fibreboard (MDF), each offering distinct aesthetic and durability characteristics.
Trim Ideas for Kitchen Islands
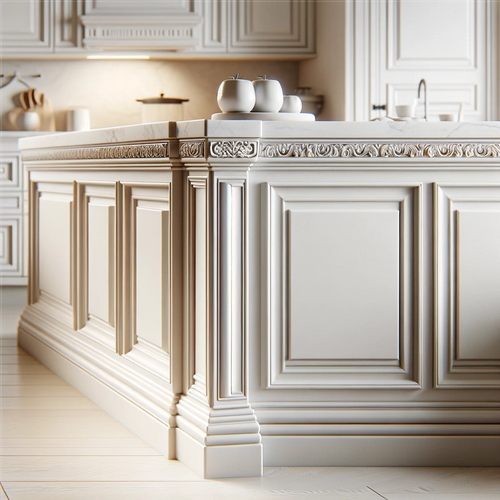
The design spectrum for kitchen island trim spans from ornate classic styles, reminiscent of historic mansions, to sleek, minimalist modern designs.
Whether you’re looking to complement a farmhouse aesthetic with rustic wood trim or achieve a streamlined look with simple, painted MDF, trim can dramatically enhance your kitchen’s overall style.
Step-by-Step Guides for Customizing Your Kitchen Island
Customize a Kitchen Island with Trim
The first step in customization is planning.
Measure your island meticulously and decide on a design that complements your kitchen’s existing decor.
You’ll need basic tools like a saw, a nail gun, and sandpaper.
Safety equipment is also essential to protect against dust and injuries.
Island Makeover with Baseboard Molding
Baseboard molding adds a refined touch to the kitchen island’s base. Selecting the right size and style of baseboard molding is crucial for a cohesive look.
This section covers the entire process, from selection to installation, ensuring a polished result.
DIY Kitchen Island Makeover
Embrace the DIY spirit with a project that lets you add personal flair to your kitchen.
This comprehensive guide walks you through adding trim and molding, including preparation, installation, and finishing touches like painting or staining.
Advanced Customization Techniques
Custom Trim Kitchen Island Makeover
For those seeking a truly unique look, this subsection explores how to design and implement custom trim patterns.
It encourages creative freedom in using elements like corbels and columns to add sophistication and individuality to your kitchen island.
Adding Molding to a Kitchen Island
Molding can transform a plain island into an elegant statement piece.
This part of the post delves into selecting molding that fits your kitchen’s style and the technical aspects of cutting, fitting, and attaching the pieces for a professional-grade finish.
Maintenance and Care for Your Customized Kitchen Island
A beautiful kitchen island deserves to be maintained properly.
This section provides practical advice on cleaning, maintaining, and repairing trim and molding to ensure your island remains a centerpiece for years to come.
Simple DIY Ideas for Kitchen Island Trim
Revamping your kitchen island can dramatically change the look and feel of your kitchen without the need for a full remodel.
With simple DIY ideas for kitchen island trim, you can add elegance and character to this central piece of your kitchen.
Below, we’ll cover how you can use basic tools like a nail gun to ensure all the details are perfect, and share tips to make your paint adhere for a lasting finish.
Add a Pop of Color with Painted Trim
One of the easiest ways to update your kitchen island trim is by adding a fresh coat of paint.
Choose a color that complements your kitchen’s palette or go bold with a contrasting shade for a statement piece.
Before painting, ensure the trim is clean and smooth to help the paint adhere better.
A primer is essential for wood trim, as it creates an ideal surface for the paint, ensuring vibrant and long-lasting color.
Install Classic Molding for Timeless Elegance
Adding molding to your kitchen island can instantly elevate its appearance, giving it a classic and timeless look.
Measure the perimeter of your kitchen island to determine how much molding you’ll need, and use a nail gun to attach the molding securely.
Pay attention to all the details, ensuring each piece is cut at the correct angle for a seamless fit.
Once installed, caulk any gaps and paint the molding in your chosen color, following the steps above to ensure the paint adheres properly.
Use Beadboard for a Cottage Chic Aesthetic
Beadboard is a fantastic way to add texture and interest to your kitchen island. Cut the beadboard panels to size and attach them to the sides of the island using a nail gun, making sure to nail them at regular intervals for a secure fit.
Fill any nail holes with wood filler, sand smooth, and apply a primer to help the paint adhere.
Choose a light, airy color for a cottage chic look, or a dark, moody hue for dramatic flair.
Create a Faux Panel Effect with Trim Pieces
For a more detailed project, consider creating faux panels on your kitchen island using strips of trim.
This involves cutting trim pieces to size and arranging them in a geometric pattern on the island’s sides.
Use a nail gun for quick and secure attachment, ensuring all the details line up perfectly.
Once the glue dries, prime and paint the entire island, taking care to apply a primer that will help the paint adhere to both the existing island surface and the new trim work.
Finishing Touches
Regardless of which idea you choose, the finishing touches will make all the difference.
Sanding between coats of paint will result in a smooth, professional finish. Adding hardware, such as new knobs or pulls, can complement your kitchen island’s new look and add functionality.
Conclusion
These simple DIY kitchen island trim ideas can breathe new life into your kitchen with just a few tools and a bit of creativity.
Remember, the key to a successful DIY project lies in paying attention to all the details, from ensuring the trim is securely attached with a nail gun to making sure the paint adheres well for a durable finish.
With these tips, your kitchen island will not only look refreshed but will also reflect your unique style and taste.
Customizing your kitchen island with trim and molding is more than a renovation project; it’s an opportunity to add a personal touch to your home’s heart.
With the right tools, some creativity, and a bit of elbow grease, you can transform your kitchen island into a masterpiece of design and functionality.